Showing posts with label graffiti photoshop. Show all posts

Thursday, December 23, 2010

Create Graffiti Alphabet Photoshop Text Effects

How to make graffiti alphabet with Photoshop Text Effects? The following is a tutorial on how to create graffiti with Adobe Photoshop:

1. You ready for this. Keep up, there's a lot to cover. First, create a new document. I chose a banner size.
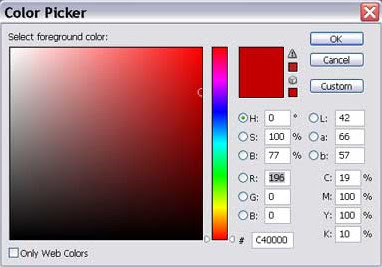
2. Choose a brick color such as the one in the picture. Fill the background layer with this color.

3. (Filters/Filter Gallery/Texturizer)
Choose brick, top left lighting. Make the bricks look big enough. Click ok.


4. Select the type tool. Type something. Choose a graffiti looking font like TagsXtreme. I think I got this font from the 1001 free fonts website.

5. The worst part of any tutorials… layer effects!!! I could type them out, but that's too much work, so here just download the style and look for you self. Remember that these effects were created for the size of the image I used. You may notice a difference if your image is much larger, or smaller in size compared to mine. graffiti.asl

6. Duplicate the text layer. Link the text layers and combine them. This will flatten the layer effects. Tell me, why isn't their a command to rasterize layer effects?

7. Ad more layer effects. I chose a simple outer glow. Then ad a sharp drop shadow for that cartoonist effect. This style was also in the styles file in step 5.

8. If you want that paint dripping effect that we see so often, Filter>Liquify. Use the forward warp tool to push the graffiti down, then use the bloat tool to make the “paint” bulge like its dripping as you can see in the final image on the bottom of the R and I.

9. Create a new layer above the rest. This is your highlights layer. Create little highlights on the top left of the paint drips, and make little cartoonist starbursts at the corners of the graffiti. If your lazy like me, you will create a single star burst and then just duplicate the layer as many times as needed.

10. Finally reduce the fill so that some of the brick wall shows through. Somewhere between 70 and 90 should look good. I'll let you be the judge.

Important note: A certain Mr. Tyler suggested to change the blend mode of the text to overlay. Thank you Tyler, all suggestions are welcome and help us all. I appreciate the input.

Extra Step: I duplicated the graffiti layer and merged them to rasterize the layer effects, the performed Filter>Texturizer>Brick with the same settings as before on the graffiti layer. Then I hit Edit>Fade Effect and reduced the opacity a bit. It looked like this. [Via]


Graffiti Art

Thursday, September 2, 2010

Graffiti alphabet >> Graffiti alphabet vector

GRAFFITI ALPHABET | GRAFFITI ART | GRAFFITI GRAPHIC DESIGN

graffiti vector, photoshop graffitiGraffiti alphabet >> Graffiti alphabet vector
Thanks for checking out my Graffiti Alphabet page.Leave a comment guys.Peace

Friday, April 16, 2010

Create Graffiti Fonts Tutorial With Photoshop

Create Graffiti Fonts Tutorial With Photoshop | Graffiti Alphabet Letters

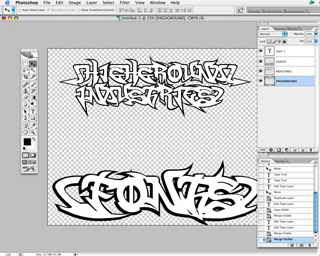
How to create and design fonts graffiti tribal style is as follows: Create a new document at 300 dpi. Try 8 to 10 inches for size. Find a picture a few stocks that will be used for this sample. Choose the font with both line and fill styles such as RaseOne, FatCap or WildStyle and type the desired word or phrase. Enter a symbol or letter that you want to include extra.
Note: If any letters or symbols that are placed on the layer itself is far more advanced work possible. In this example the font is left exactly as typed and a minimum number of layers used.
Once you have the text you want to copy or duplicate the layer or layers. If you do not use a layer of paste just in front of other objects.

Black and white graffiti fonts

On a new layer to change the font style of the frame to fill out and change the color for each color desired.
Align the fill style directly to the lines of force.
I will select the area with color so it is better to use colors with high contrast black and white as shown in this example.

Graffiti Alphabet Letters | Graffiti Fonts

Repeat the process till you have all the basic words, phrases, or symbols you want for your layout.
If you work in a high-end software such as Photoshop you'll want to combine the contents of each layer by layer so that each section commensurate line of graffiti is one object and can be easily moved around.
Graffiti alphabets with the flame effect
Open one of your stock images like this simple fire images or images of cartoon characters you like.
Copy pictures or enough to cover the desired area and paste into your layout

Graffiti fonts with the effects of fire


Move the flame image or character image layers were imported into the rear and to the desired position in your layout.
At this point you can remove the white area in the text and the fire will be visible. You most likely will want to erase the image area of fire on the outside so please proceed to the next step.

Graffiti Alphabets

Use the selection tool to select the empty space around you graffiti
Change the layer to the layer that contains the imported image while keeping the current selection.
Simply press delete to delete the image area that shows the back of your graffiti text.

Write my name in graffiti

Use a selection tool to select white area fills your fonts and once again it. Just delete you will see the image now shows through and the outline is still in place. Again you should merge or group to fill and outline so that they are one object (after making adjustments to color and apply effects to the line and fill out to obtain the desired view) Bring in the second picture to fill the entire background. and you're basically done.
The samples shown here do not use effects and has no particular colorscheme or be seen but the process is a cookie-cutter base can create a variety of 2D and 3D effects in a variety of applications.